Build a robot on the bench
The robot bench is a page for putting a small robot together out of real hobby parts: 2020 aluminium extrusion, MG996R and SG90 servos, their brackets and horns, steppers, gear motors, wheels, rods, bearings and the screws and nuts that hold them. Every part is modelled to its datasheet, with its real mounting features: the holes in a bracket, the spline on a servo's output, the slot along a bar, the bore of a bearing. You never type a coordinate. You hold a part, pick one of the places it fits, and it snaps there, screws and all. The kernel runs in your browser, and nothing is uploaded.
This page builds a servo on a bar by hand, then opens a ready-made pan-tilt head, moves it, reads its checks and takes it home. Every picture is the bench itself, at each step. Open the bench beside this page and follow along.
Start with a bar
The bench opens empty, on a grid: the parts drawers on the left, the view in the middle, and on the right the inspector, the joints, the poses and the checks. New empties it again at any time, and Undo and Redo walk back and forward through every change.
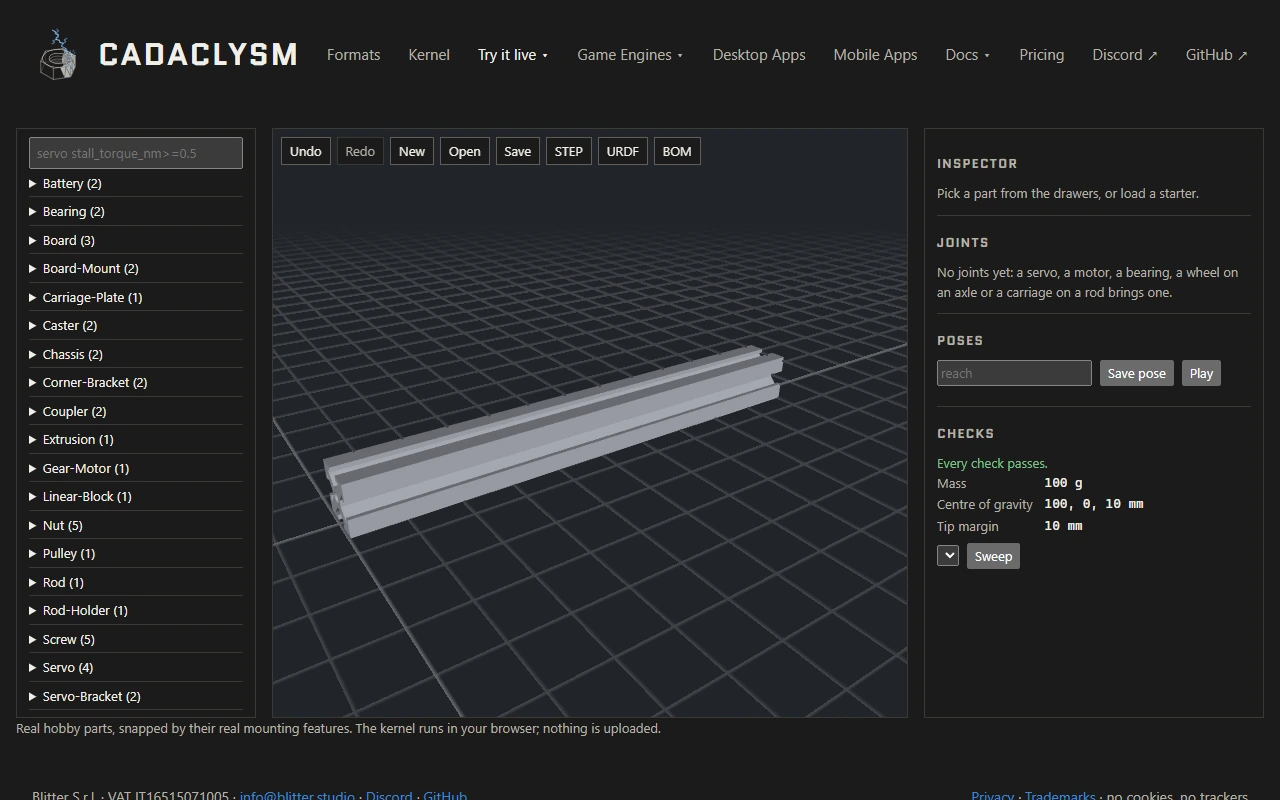
Open the Extrusion drawer and pick the 2020 bar. A part with a size asks for it first: give it a length of 200 mm and hold it. The first part has nothing to snap to, so press Enter to put it down. It becomes the ground, the part every other one is fixed to, and the checks at once give its mass and its centre of gravity.
The search box above the drawers filters by name or by a datasheet figure: servo stall_torque_nm>=0.5 leaves only the servos strong enough.
Hold a part and pick a marker
From the Servo-Bracket drawer, pick the MG996R mount. While you hold it, the bench marks in blue every place on the bench where it fits: here, the ends of the bar's slots, since the mount's base takes a T-nut in a slot.
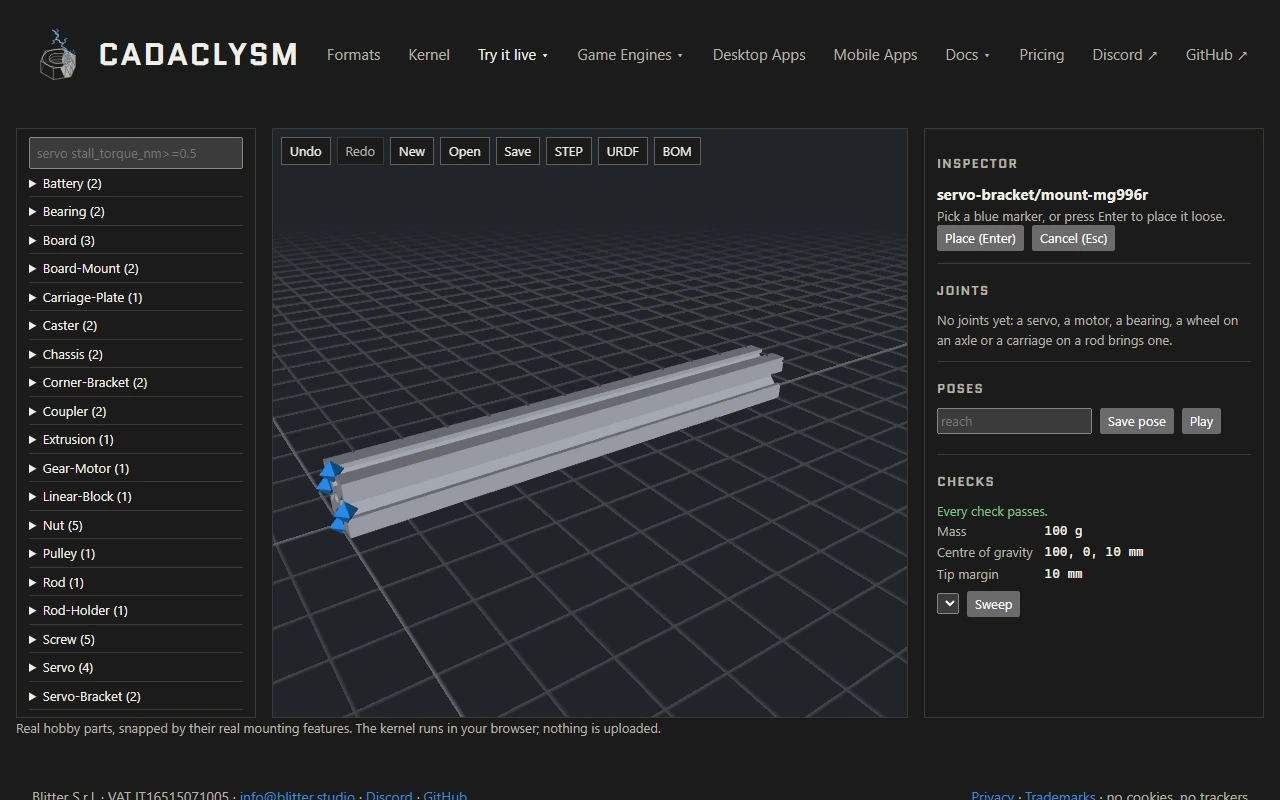
Click the marker on the bar's top slot. A blue ghost of the mount appears where it would go.
Turn, flip and slide the ghost
The ghost is only a proposal, and the inspector shows what can change. R turns it to the next way round the fit allows (Shift+R the other way), F flips it to the other face, and the arrow keys step it to the next hole of a pattern. In a slot it slides: type 90 in the Along box to put it 90 mm along the bar. Then press Enter, or Place, to put it down; Esc lets go of it.
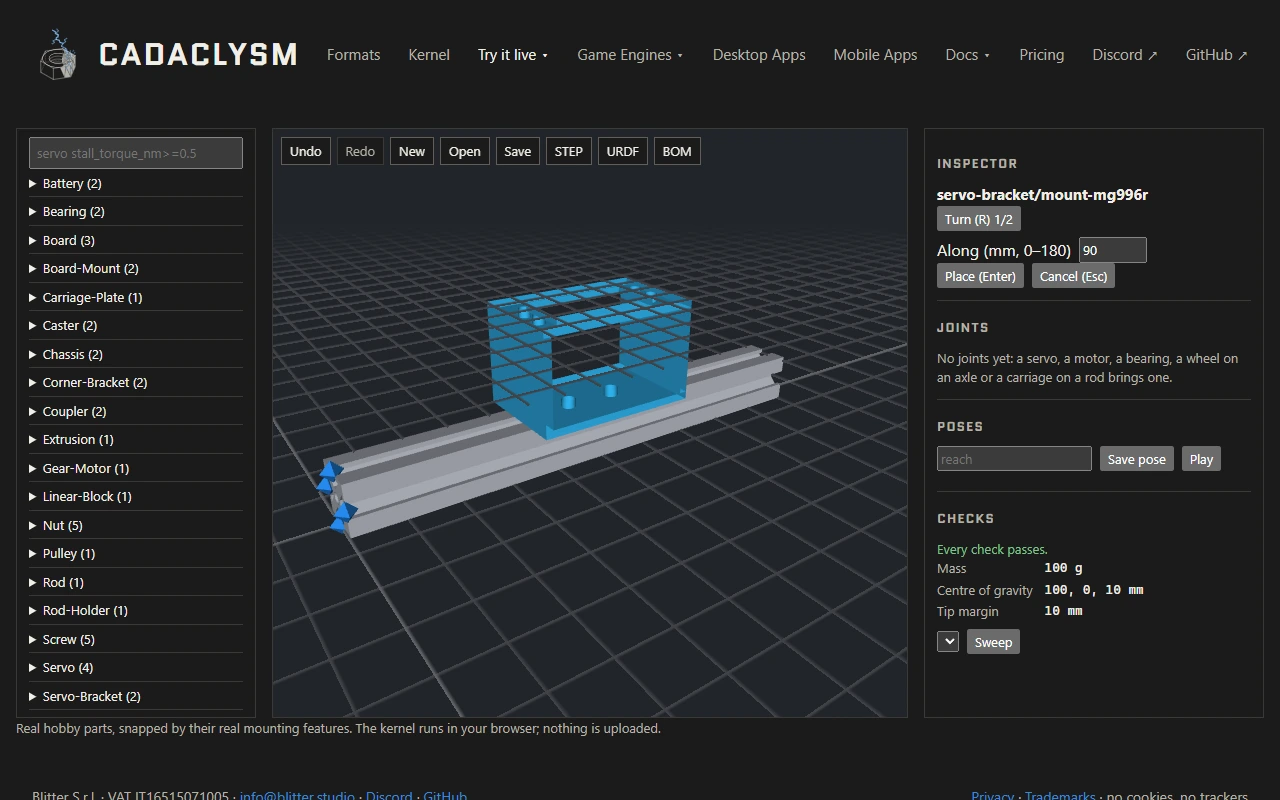
Placed, the mount is held to the bar by screws and T-nuts, which the bench picks by itself at a length that fits; select the mount to choose another screw length.
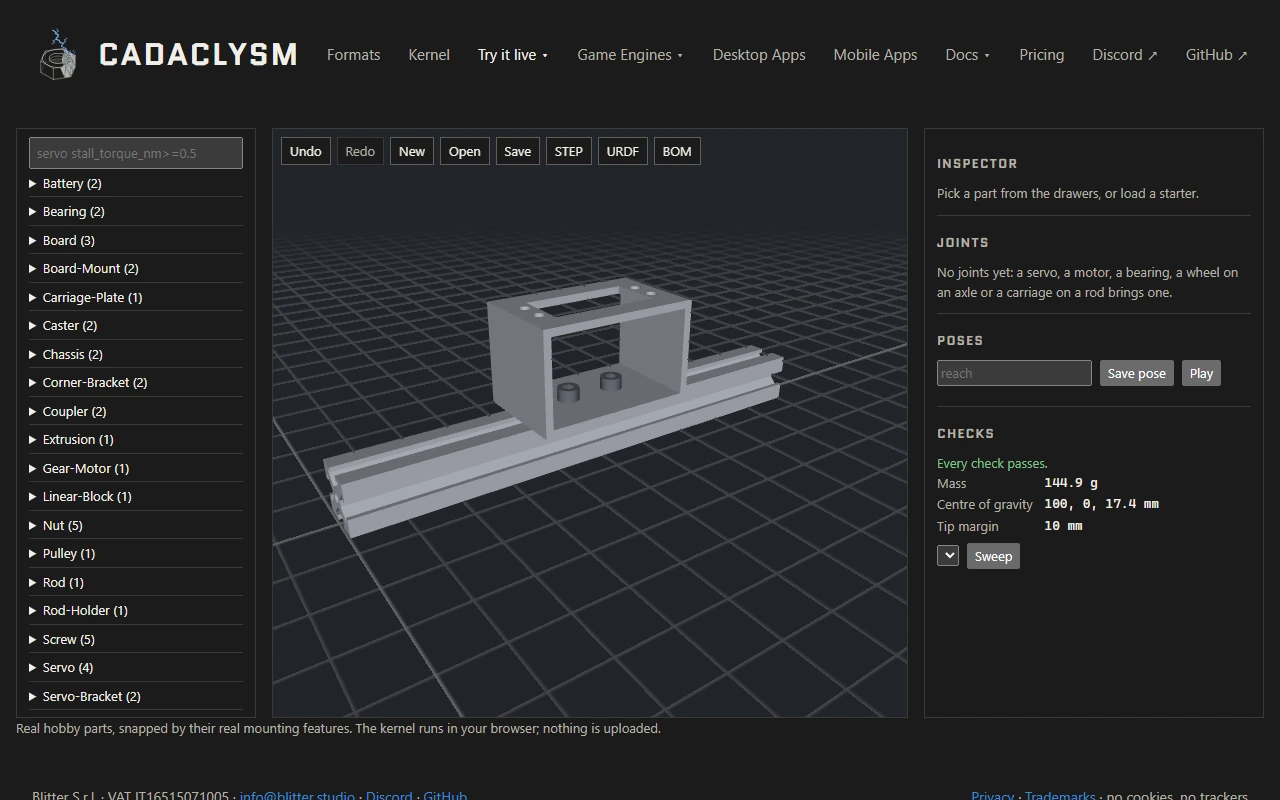
A placed part can still change: click it, and the same keys turn, flip and step it; Delete takes it off.
Add the servo
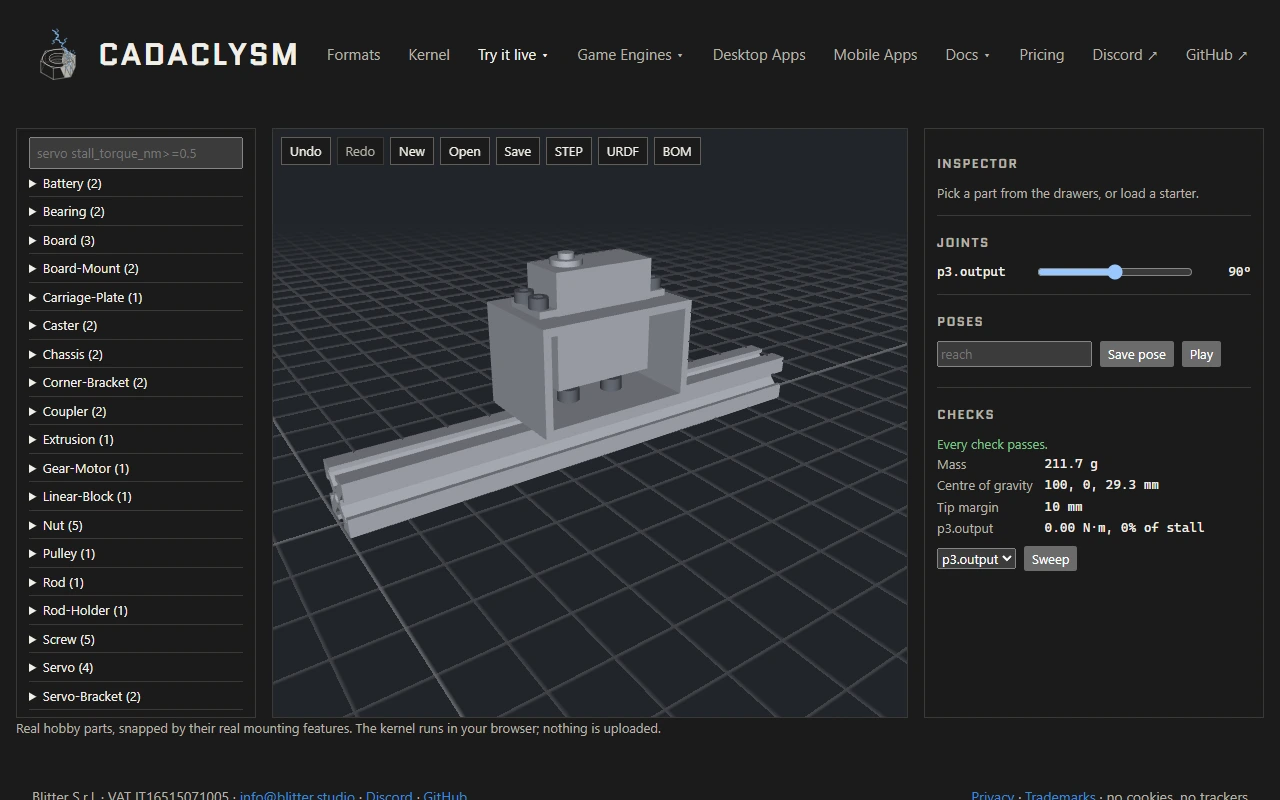
Pick the MG996R from the Servo drawer. This time the marker is on the mount: the pocket that takes the servo's flange. Click it, and press Enter. The servo drops into the mount, screwed through its flange, and brings the bench's first joint: its output, which shows up under Joints with a slider.
Or open a starter
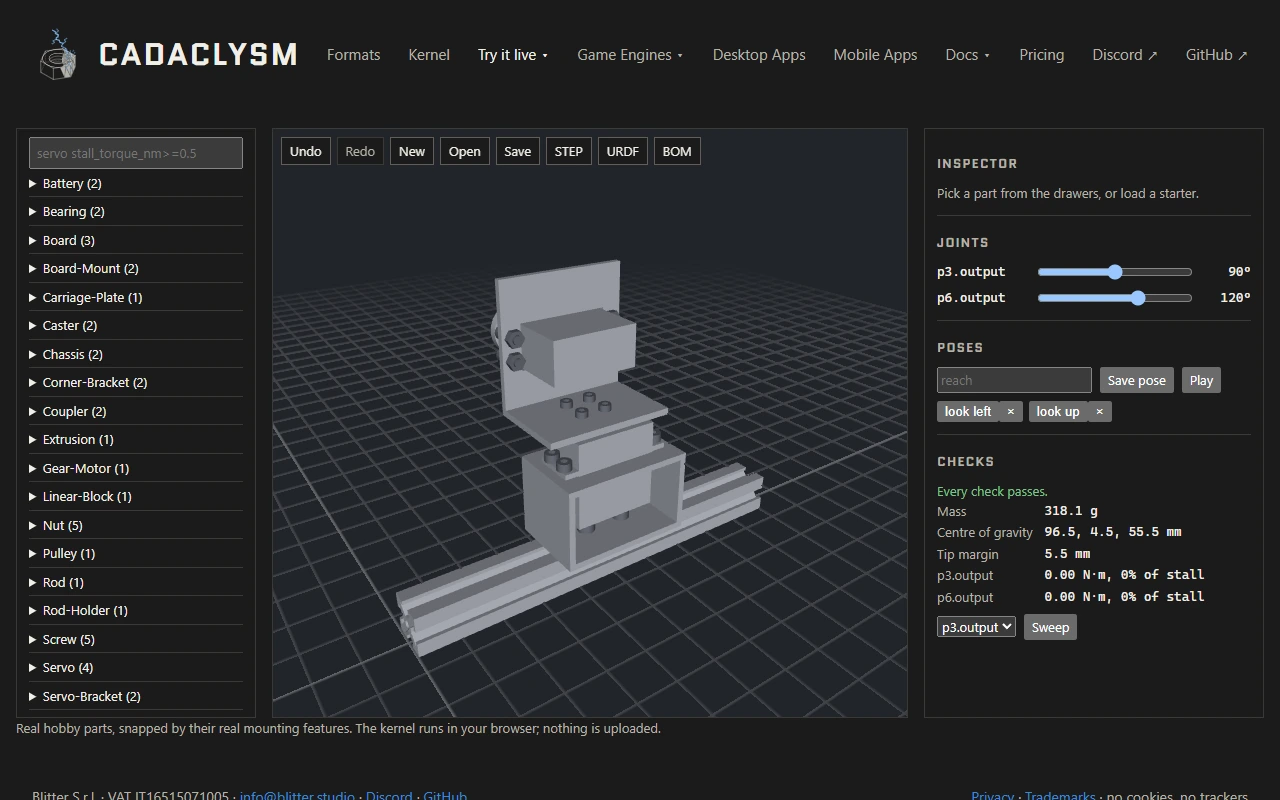
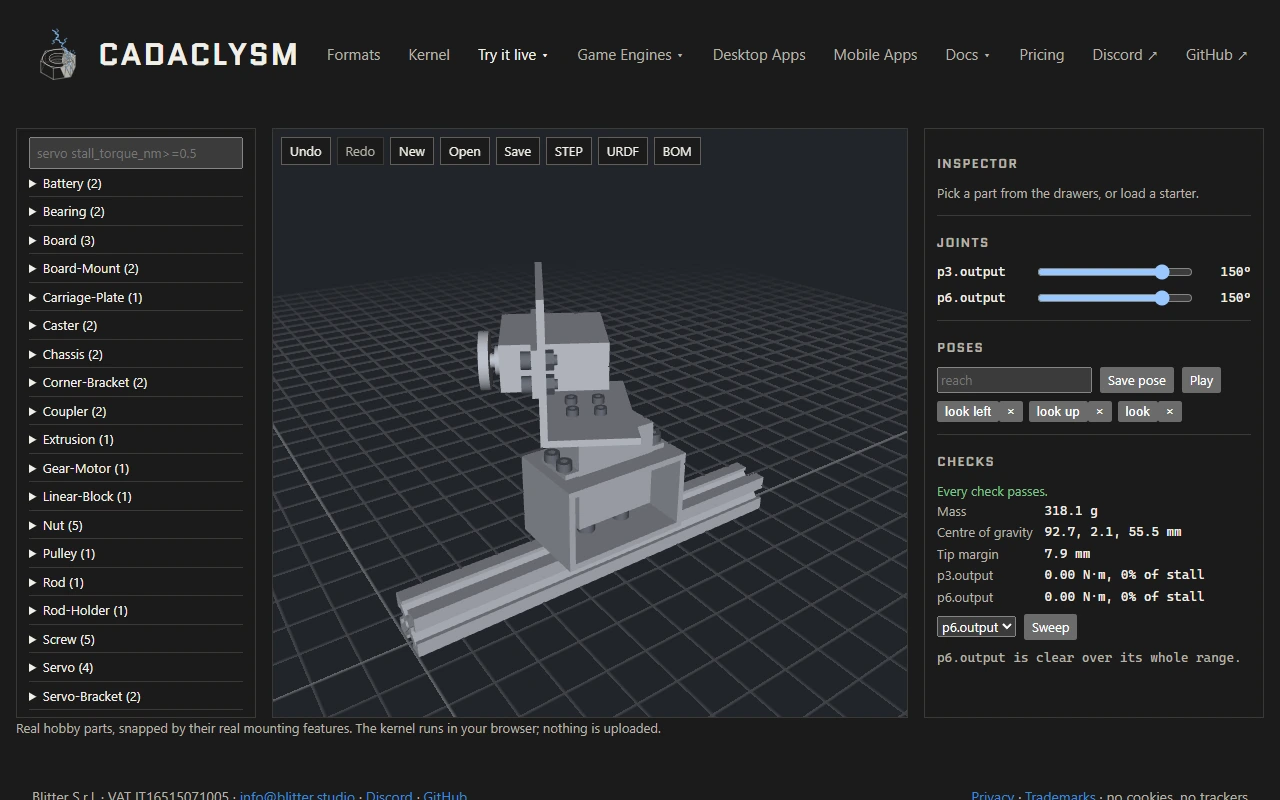
The four buttons under Starters, at the bottom of the drawers, each open a whole robot to start from. Pan-tilt head is the servo above with a second one on top: a disc horn on the pan servo carries a U bracket, and the tilt servo in that bracket turns a second horn. It opens with two poses already saved, look left and look up.
Move the joints, and save a pose
Drag a joint's slider and the robot follows; each joint stops at its part's real range. Here the pan and the tilt are both at 150°. To keep a position, type a name in the box under Poses and press Save pose. A saved pose is a button: click it to go back to that position, and Play moves the robot through every pose in turn.
Read the checks; sweep a joint
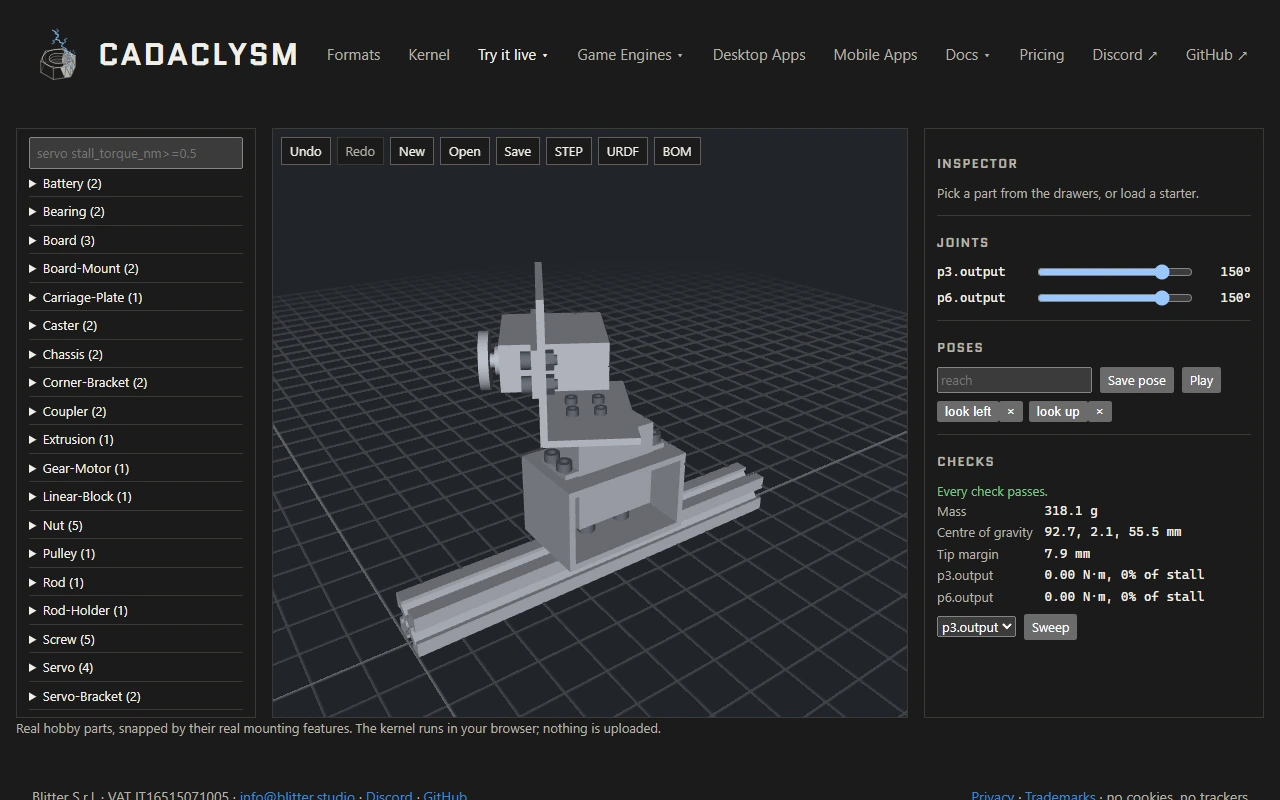
The checks follow every change and every move of a joint. They give the mass and the centre of gravity, the tip margin (how far that centre is inside the robot's footprint), and each joint's load as a torque and a share of its servo's stall torque. Above them is the list of problems: a screw too short for what it holds, a loop of parts that does not close, a robot that tips over, a servo asked for more than it has, two parts in each other. Click a problem and its parts flash red.
The checks look at the pose on screen. To look at every pose a joint can take, pick it beside Sweep: the bench turns it through its whole range and lists where parts would collide, or says it is clear. Here the pose look is saved, and the tilt is clear over its whole range.
Take it home
The toolbar over the view writes what you built:
- STEP: the robot as a STEP assembly, every part and fastener in place, for any CAD program.
- URDF: a zip with the robot's URDF and a mesh per link, its joints with their limits, for ROS and robot simulators.
- BOM: the bill of materials as a CSV: every part, screw and nut counted, with its mass and where it comes from.
- Save: the project itself, a small JSON file that Open reads back. The bench also keeps your work in the browser between visits. A project from an older bench, with a part the catalogue no longer has, opens repaired, and the bench says what it took out.
The other starters
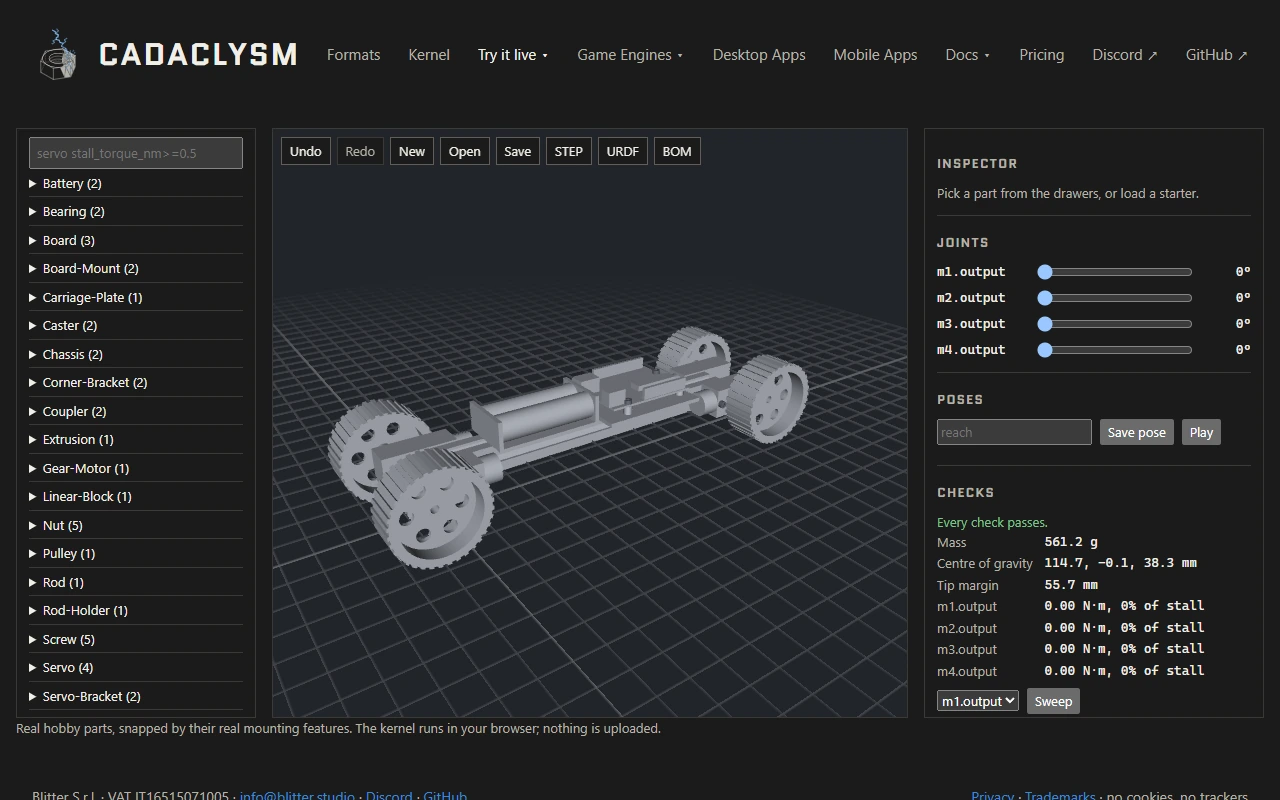
4-wheel rover: a 2020 bar for a chassis, four TT gear motors with 65 mm wheels, a pack of two 18650 cells and an Arduino Uno on its mount. Each motor's output is a joint, and the tip margin is measured over the four wheels.
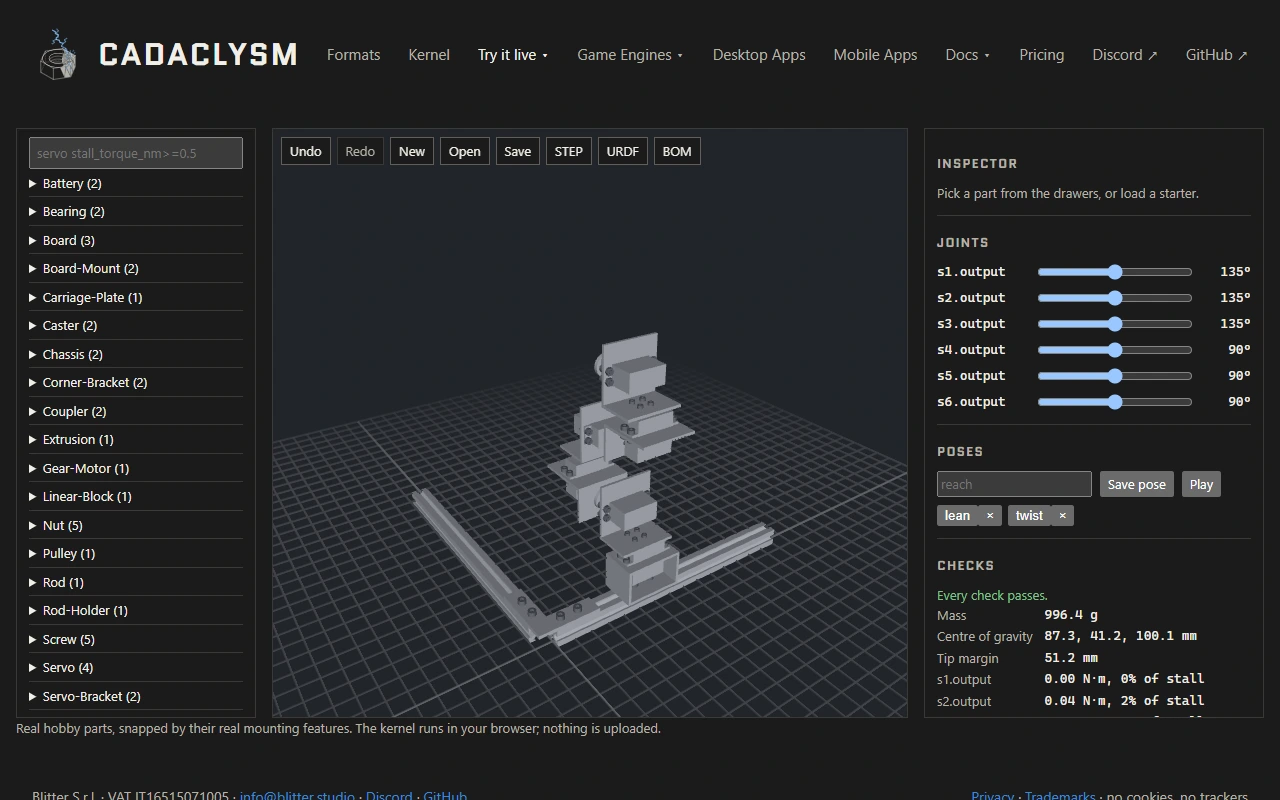
6-servo arm: three DS3218 and three MG996R servos, joined by horns and U brackets, on an L of two 2020 bars, with the poses lean and twist. It is the starter where the loads matter: lean it out and watch the shoulder's share of its stall torque climb.
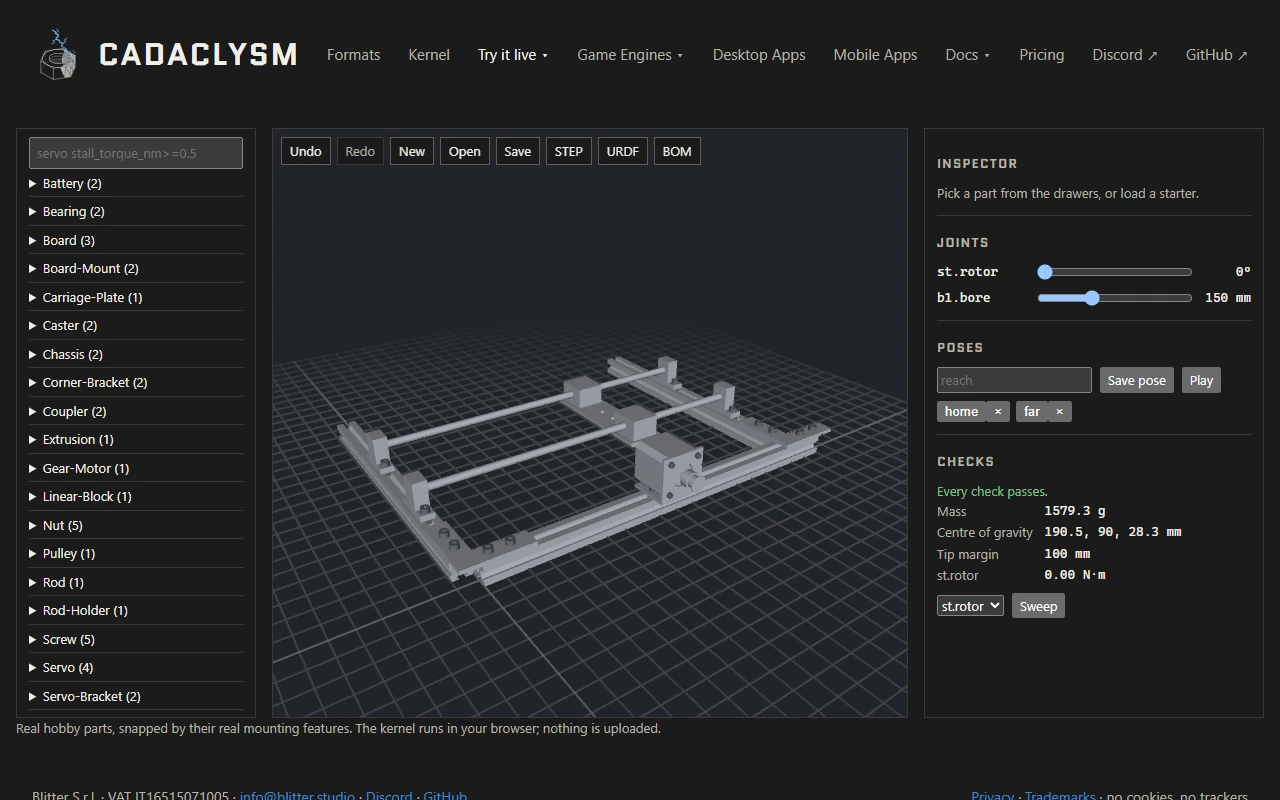
2020 gantry: a frame of three 2020 bars, two 8 mm rods in SK8 holders, a carriage plate on two SC8UU linear bearings, and a NEMA 17 stepper with a GT2 pulley. A carriage on a rod is a joint too: its bearing slides along the rod, so its slider is in millimetres, not degrees. Save poses along it (home at 60 mm and far at 300 mm are there already) and sweep it like any other joint. The stepper's shaft is a joint of its own: with no belt yet, it does not drive the carriage.
The keys
Enter: place the held part (loose, if no marker is picked).Esc: let go of the held part.R,Shift+R: turn the held or selected part to the next way round, or the one before.F: flip it to the other face.←,→: step it to the previous or next hole of a pattern.DeleteorBackspace: take the selected part off.Ctrl+Z: undo.Ctrl+YorCtrl+Shift+Z: redo.- In the view: drag to orbit, right-drag to pan, the wheel to zoom; click a part to select it.
What the bench does not do yet
No belts or pulleys driving a joint, no wiring, and no dynamics: the checks are static, a robot standing still in each pose.